- FIND utilties
- Home Automation
Using FIND without an app
This is a extension of FIND, the Framework for Internal Navigation and Discovery, which is based on the idea of Lucius Fox’s sonar system in The Dark Knight that is used to track cellphones.
The system uses a network of Raspberry Pis which sniff the WiFi probe requests from WiFi-enabled devices and sends these parcels to a central server which compiles and forwards the fingerprint to the FIND server which then uses machine learning to classify the location based on the unique WiFi fingerprints.
This system does not require being logged into a particular WiFi - it will track any phone/device with WiFi enabled! (Caveat: for iOS devices it will only track if Wi-Fi is associated with a network - any network, though - because of MAC spoofing it uses for security). This system also does not require installing any apps on a phone. Tracking occurs anytime a WiFi chip makes a probe request (which is every minute or so). For this to work, it requires a one-time setup to populate the system with known fingerprints of known locations before it can pinpoint locations (see #3 below).
How does it work?
You can setup Raspberry Pis around a house in a way that they will see different signal strengths from various WiFi devices. Each WiFi-enabled device see requests from the various Raspberry Pis with different strengths (see colored bars in Figure below). These graphs are a fingerprint which can be used to uniquely classify the location.
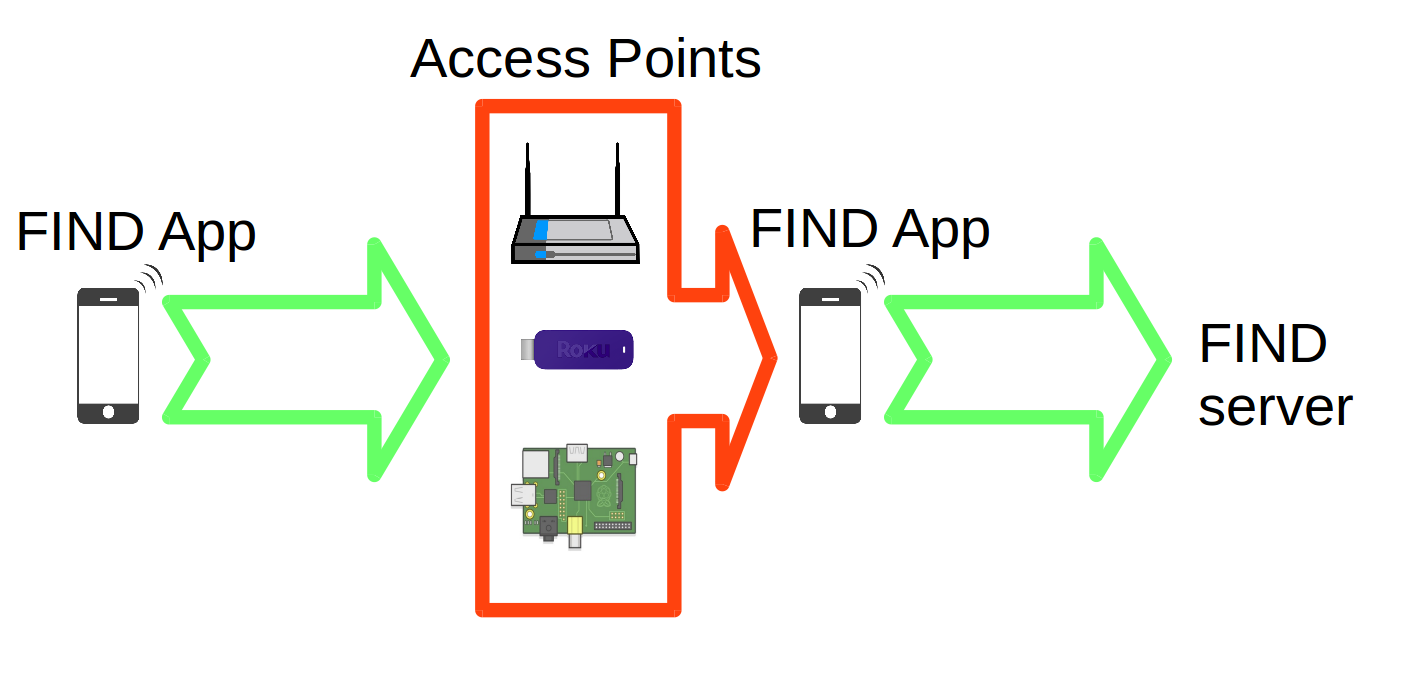
The Raspberry Pi cluster gets probe requests to various WiFi devices, and compiles these and forwards them to a FIND-LF server. This FIND-LF server then sends a compiled fingerprint to a main server. This system uses WiFi probe requests, which occur on any WiFi enabled device, as long as WiFi is enabled. These probe requests generally occur when a scan takes place, which is every few minutes when the phone is being used.
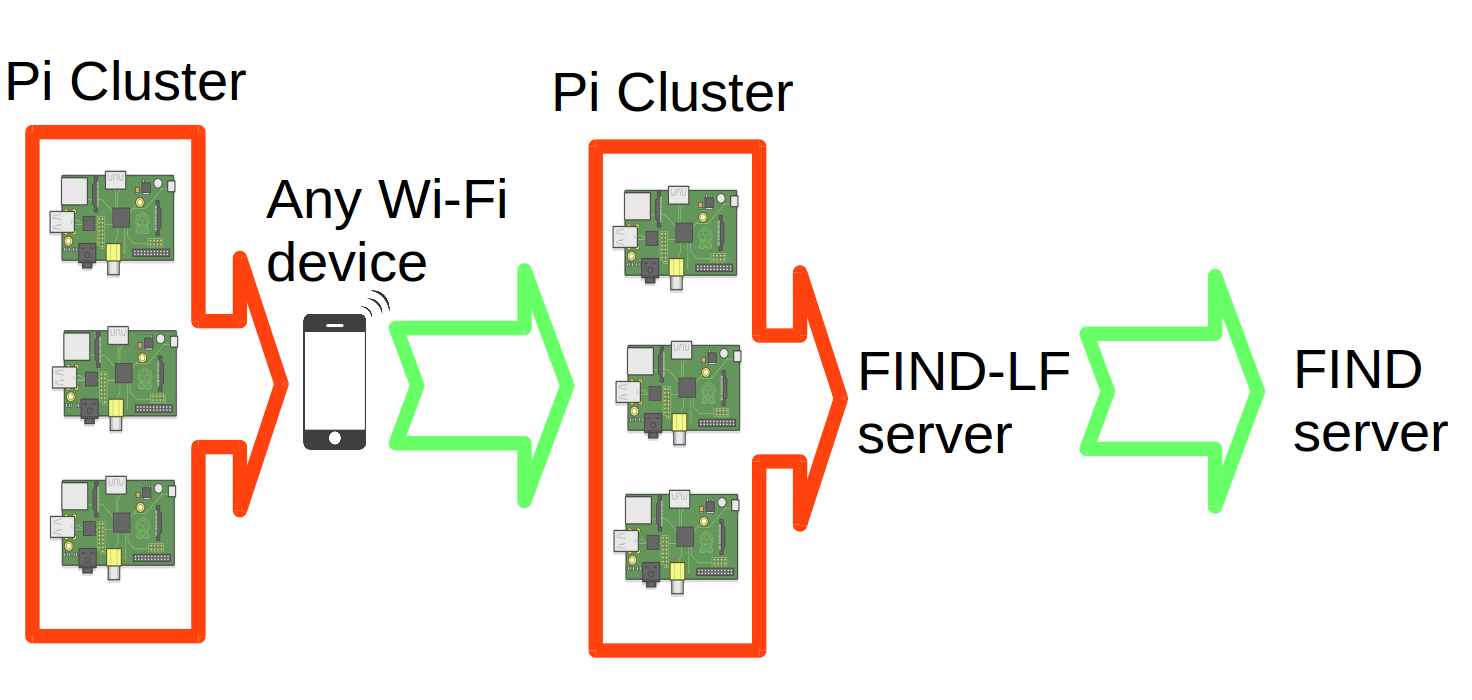
Once sent to the FIND server, the location can be directly determined. For more information about this, see the FIND README.
Requirements
- Several Raspberry Pis, where each Raspberry pi has a USB Wifi adapter that supports “monitor mode”, like the TL-WN722N, and it additionally has a second internet connection via ethernet or another adapter
- A computer with Python3 and SSH installed
Setup
1. Initialize Pis
Install Raspbian lite onto a Pi. If you don’t use the pi user, make sure to give the user sudo acess. Then initialize the Raspberry Pi with the following script
sudo sh -c "$(curl -fsSL https://raw.githubusercontent.com/schollz/find-lf/master/node/initialize.sh)"
Alternatively, you can do this using my script for PiBakery.
Also edit /etc/network/interfaces and remove the wpa-conf line for wlan1.
Do this for several Pis and then plug in the WiFi adapter that has “monitor” mode.
2. Start Pi cluster
First make sure you have SSH installed and nmap.
sudo apt-get install openssh-client openssh-server nmap
Then download cluster.py for accessing the cluster
wget https://raw.githubusercontent.com/schollz/find-lf/master/tools/cluster.py
Then, to initialize, just run
python3 cluster.py initialize
to which you’ll be asked for the information about your cluster. Choose any group that you want, but remember it, as you will need it to login to the FIND server. For the lf address, you can use the default (a public server) or set it to your own. See find-lf/server/README.md for more information.
To easily find which hostnames/IPs are on your network, use
python3 cluster.py list
Startup the Pi cluster using python3.py cluster start. You can check the status with python3 cluster.py status
3. Classify locations using Pi cluster
After the cluster is up in running, you need to do learning. Take a smart phone and identify its mac address, something like AA:BB:CC:DD:EE:FF. Take your phone to a location. Then activate the find-lf server to do learning either by switching on the find-lf website or running python3 cluster.py -u AA:BB:CC:DD:EE:FF -l location.
This is important! Before moving to a new location, make sure to turn off learning by switching to tracking. Activate this on the find-lf server using the the find-lf website or use python3 cluster.py track.
Repeat these steps for as many locations as you want.
4. Track all the cellphones!
Now just go to https://ml.internalpositioning.com and login using your group name to see tracking of all the phones!
You can also track a single phone using https://ml.internalpositioning.com/GROUP/dashboard?user=AA:BB:CC:DD:EE:FF.
Using FIND with a map
The find-map is a simple setup for projecting the current locations using GPS coordinates. For more information, see find-map README.
Home Automation
Home Assistant
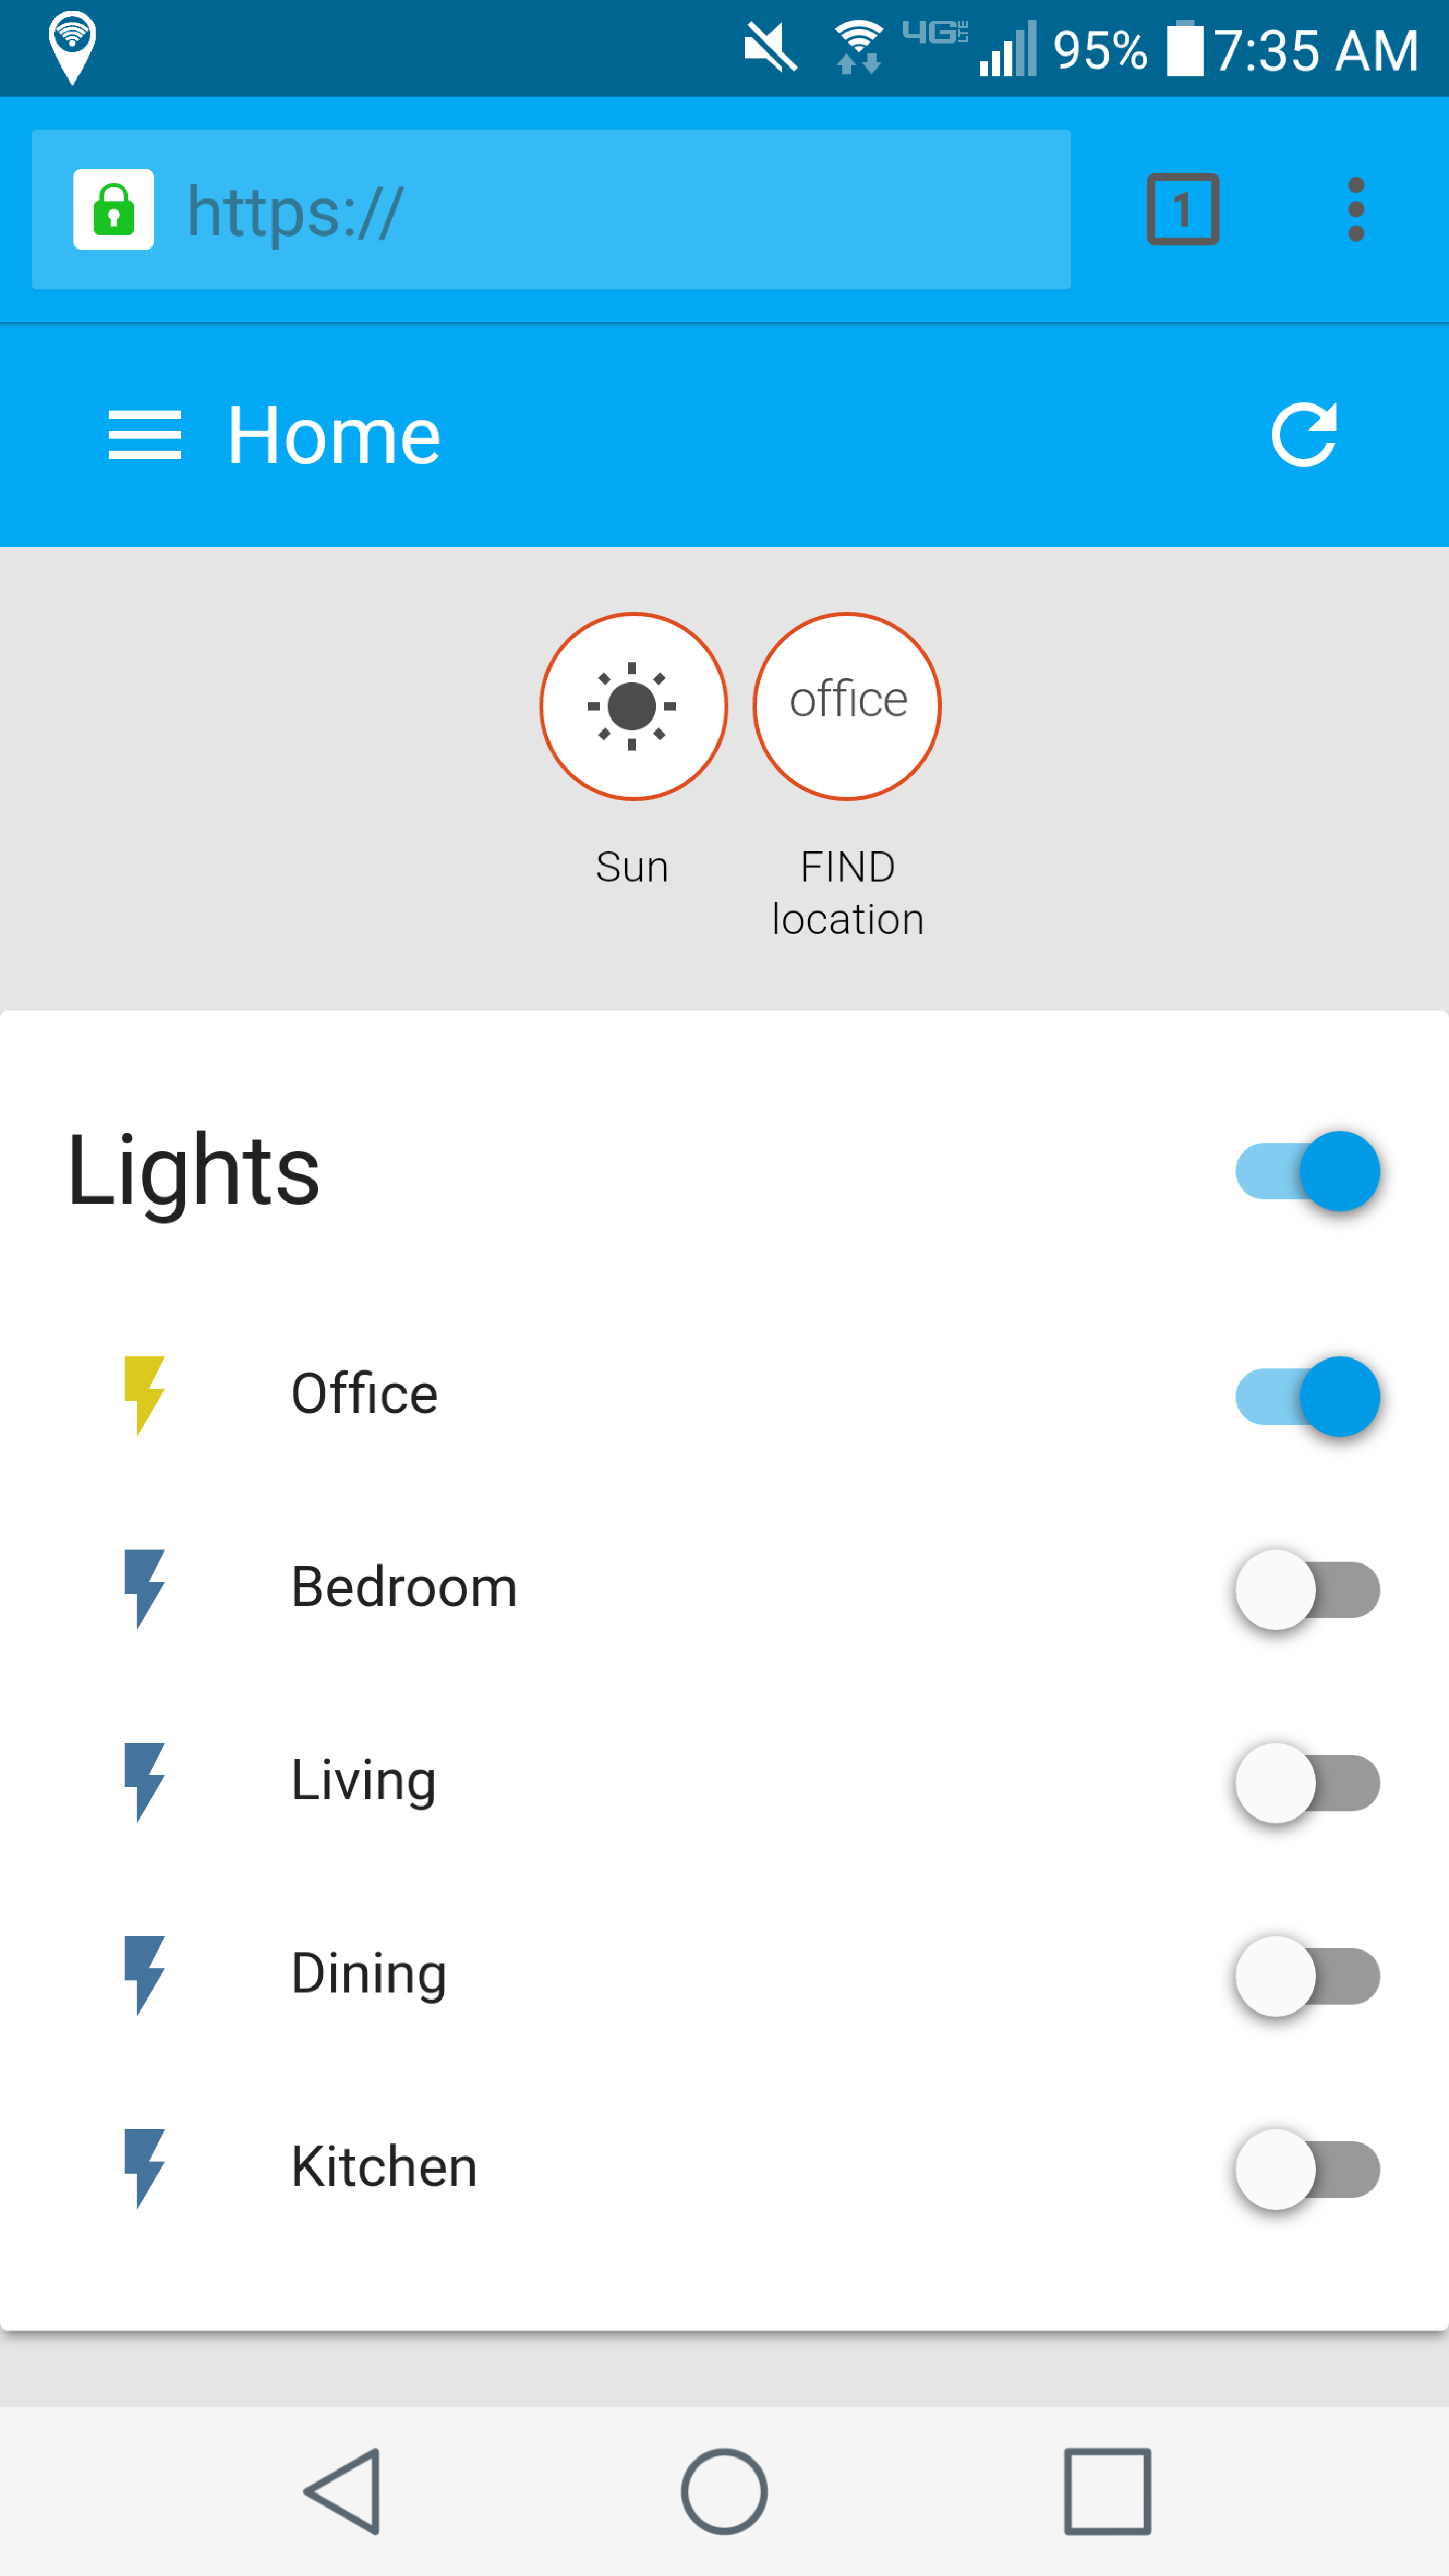
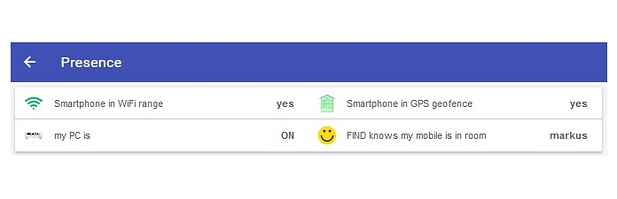
Home Assistant is an excellent framework for tracking the state of devices in your home, and can control them from a single interface.
I’ve created a example template file for home assistant that can be used with FIND:
Here’s an example of my screen using the system:
OpenHab
OpenHab open Home Automation Bus (openHAB) is a pure Java solution that aims at providing a universal integration platform for all things around home automation.